In the Groups section of the Office 365 admin center, you can create and manage these types of groups:
Create an Office 365 group
1. Sign in with your Office 365 admin account at https://portal.office.com/adminportal/home.
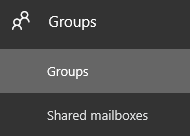
2. Choose Groups > Groups in the left navigation pane.
3. Choose Add a group.

4. Choose the type of group you want to create, based on what you want to use it for.
5.Leave Send copies of group conversations set to On if you want members to receive messages and calendar items in their own inbox, in addition to the group mailbox.
6.Choose Select Owner and then choose the name of the person who will be designated to manage the group. Anyone who is a group owner will be able to delete email from the Group inbox. Other members won't be able to delete email from the Group inbox.
7. Choose Add.
Add members to an Office 365 group
1. Refresh your Office 365 admin center page so your new Office 365 group appears.
2. Select the group you want to add members to.
3. Next to Members, choose Edit.
4. Enter the names of the people you want to be members of the group and select their name from the list. Alternatively, you can let individuals add themselves or request approval to join later.
5. Choose Save to update the Office 365 Group.
Distribution List
It's better to create an Office 365 group than a distribution list. The only reason to create a DL now is if your organization has Groups disabled.
1. Sign in with your Office 365 admin account at https://portal.office.com/adminportal/home.
2. Choose Groups > Groups in the left navigation pane.
3. Choose Add a group.

4. Leave Send copies of group conversations set to On if you want members to receive messages and calendar items in their own inbox, in addition to the group mailbox.
5. Choose Add.
Important: It might take up to 60 minutes until the group is ready for the Admin Portal. Meanwhile, you will be able to manage the group through the Exchange Portal.
1. Go to Admin centers > Exchange.
2. In the Exchange Admin Center, go to Recipients > Groups.
3. Select one or more distribution lists (also called a distribution group) from the group's page.

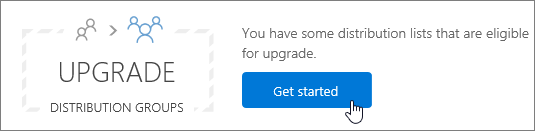
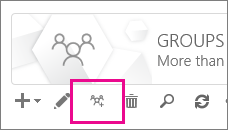
4. Choose the upgrade icon.
5. On the information dialog, choose Yes to confirm the upgrade. The process begins immediately. Depending on the size and number of DLs you're upgrading, the process can take minutes or hours.
6. If the list isn't complete, wait a while longer and then choose refresh to see whats been successfully upgraded.
Security Group
Control access to one drive and share point and are used for mobile device management for office 365.
1. Sign in with your Office 365 admin account at https://portal.office.com/adminportal/home.
2. Choose Groups > Groups in the left navigation pane.
3. Choose Add a group.

4.To add members, select the Security group on the Groups page and choose Edit members on the Bulk actions for groups selected dialog.
On the Office 365 Groups page, you can create groups of user accounts that you can use to assign the same permissions to in SharePoint Online and CRM Online. For example, an administrator can create a security group to grant a certain group of people access to a SharePoint site.
Mail enabled security group
This group can be used to control access to one drive and SharePoint as well as to send an email to all members of the list.
1. Sign in with your Office 365 admin account at https://portal.office.com/adminportal/home.
2. Choose Groups > Groups in the left navigation pane.
3. Choose Add a group.

4. Leave Send copies of group conversations set to On if you want members to receive messages and calendar items in their own inbox, in addition to the group mailbox.
5. Choose Add.
Use the EAC to create a security group
1. In the EAC, navigate to Recipients > Groups.
2. Click New + > Security group.
3. On the New security group page, complete the fields.
4.When you've finished, click Save to create the security group.
NOTE: By default, all new mail-enabled security groups require that all senders be authenticated. This prevents external senders from sending messages to mail-enabled security groups.
For any further queries, you can reach us by creating a ticket at Foetron Support Portal or you can directly call us on our support helpline number +91-124-4506200
Was this article helpful?
That’s Great!
Thank you for your feedback
Sorry! We couldn't be helpful
Thank you for your feedback
Feedback sent
We appreciate your effort and will try to fix the article