Starting in Windows 10, version 1709, you can use a Group Policy to trigger auto-enrollment to MDM for Active Directory (AD) domain-joined devices.
The enrollment into Intune is triggered by a group policy created on your local AD and happens without any user interaction. This means you can automatically mass-enroll a large number of domain-joined corporate devices into Microsoft Intune. The enrollment process starts in the background once you sign in to the device with your Azure AD account.
Requirements:
- AD-joined PC running Windows 10, version 1709 or later
- The enterprise has configured a mobile device management (MDM) service
- The enterprise AD must be registered with Azure Active Directory (Azure AD)
- The device should not already be enrolled in Intune using the classic agents (devices managed using agents will fail enrollment with
error 0x80180026) - The minimum Windows Server version requirement is based on the Hybrid AAD join requirement.
The auto-enrollment relies on the presence of an MDM service and the Azure Active Directory registration for the PC. Starting in Windows 10, version 1607, once the enterprise has registered its AD with Azure AD, a Windows PC that is domain joined is automatically AAD registered.
When the auto-enrollment Group Policy is enabled, a task is created in the background that initiates the MDM enrollment. The task will use the existing MDM service configuration from the Azure Active Directory information of the user. If multi-factor authentication is required, the user will get a prompt to complete the authentication. Once the enrollment is configured, the user can check the status in the Settings page.
In Windows 10, version 1709 or later, when the same policy is configured in GP and MDM, the GP policy wins (GP policy takes precedence over MDM). Since Windows 10, version 1803, a new setting allows you to change the policy conflict winner to MDM.
For this policy to work, you must verify that the MDM service provider allows the GP triggered MDM enrollment for domain joined devices.
Verify auto-enrollment requirements and settings
To ensure that the auto-enrollment feature is working as expected, you must verify that various requirements and settings are configured correctly. The following steps demonstrate required settings using the Intune service:
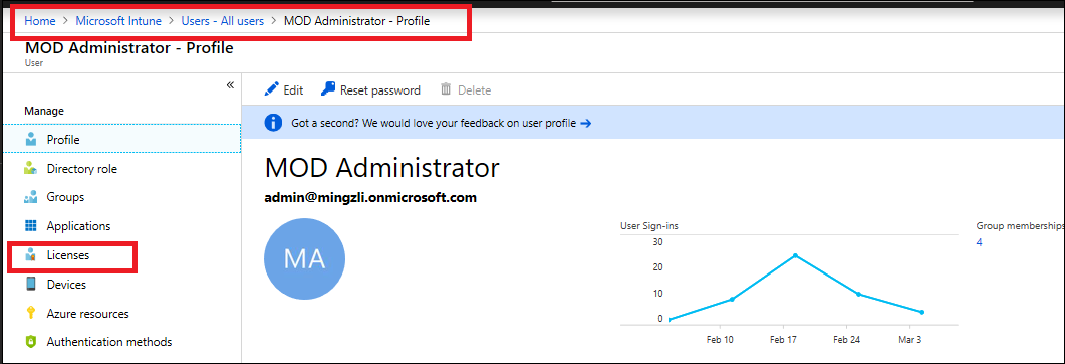
- Verify that the user who is going to enroll the device has a valid Intune license.
-
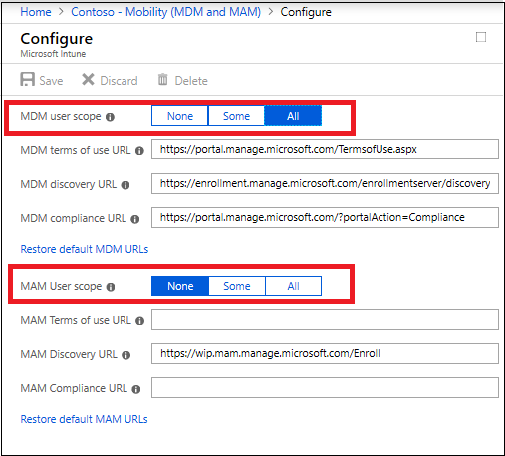
Verify that auto-enrollment is activated for those users who are going to enroll the devices into Intune.
Important
For BYOD devices, the MAM user scope takes precedence if both MAM user scope and MDM user scope (automatic MDM enrollment) are enabled for all users (or the same groups of users). The device will use Windows Information Protection (WIP) Policies (if you configured them) rather than being MDM enrolled.
For corporate devices, the MDM user scope takes precedence if both scopes are enabled. The devices get MDM enrolled.
-
Verify that the device OS version is Windows 10, version 1709 or later.
-
Auto-enrollment into Intune via Group Policy is valid only for devices which are hybrid Azure AD joined. This means that the device must be joined into both local Active Directory and Azure Active Directory. To verify that the device is hybrid Azure AD joined, run
dsregcmd /statusfrom the command line.
You can confirm that the device is properly hybrid-joined if both AzureAdJoined and DomainJoined are set to YES.
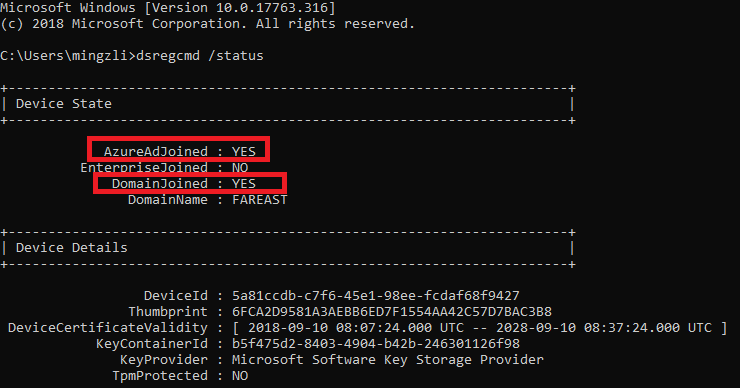
Additionally, verify that the SSO State section displays AzureAdPrt as YES.

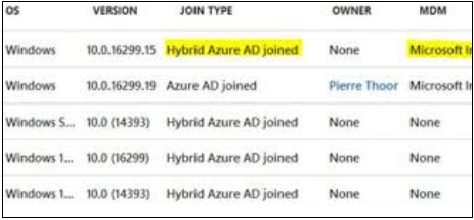
This information can also be found on the Azure AD device list.
-
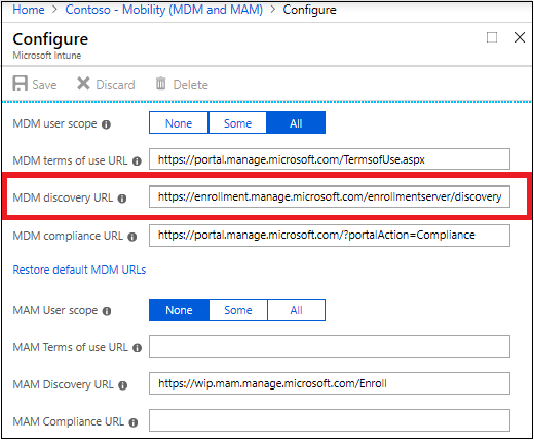
Verify that the MDM discovery URL during auto-enrollment is https://enrollment.manage.microsoft.com/enrollmentserver/discovery.svc
-
Some tenants might have both Microsoft Intune and Microsoft Intune Enrollment under Mobility. Make sure that your auto-enrollment settings are configured under Microsoft Intune instead of Microsoft Intune Enrollment.

-
Verify that the Enable Automatic MDM enrollment using default Azure AD credentials group policy (Local Group Policy Editor > Computer Configuration > Policies > Administrative Templates > Windows Components > MDM) is properly deployed to all devices which should be enrolled into Intune.
You may contact your domain administrators to verify if the group policy has been deployed successfully.
-
Verify that the device is not enrolled with the old Intune client used on the Intune Silverlight Portal (this is the Intune portal used before the Azure portal).
-
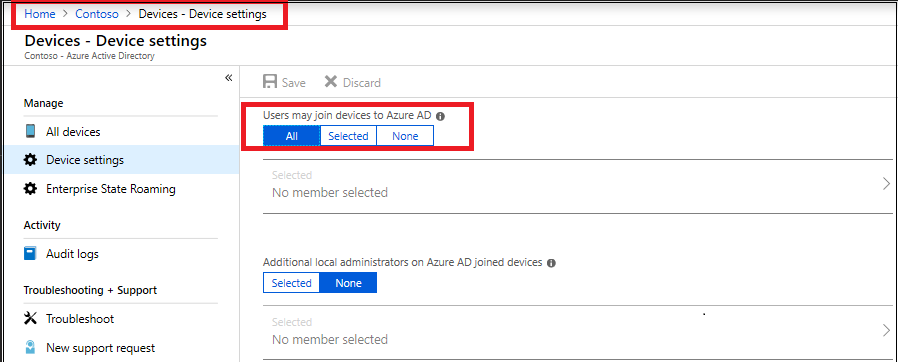
Verify that Azure AD allows the logon user to enroll devices.
-
Verify that Microsoft Intune should allow enrollment of Windows devices.

Configure the auto-enrollment Group Policy for a single PC
This procedure is only for illustration purposes to show how the new auto-enrollment policy works. It is not recommended for the production environment in the enterprise. For bulk deployment, you should use the Group Policy Management Console process.
Requirements:
- AD-joined PC running Windows 10, version 1709 or later
- Enterprise has MDM service already configured
- Enterprise AD must be registered with Azure AD
- Run GPEdit.msc
Click Start, then in the text box type gpedit.

-
Under Best match, click Edit group policy to launch it.
-
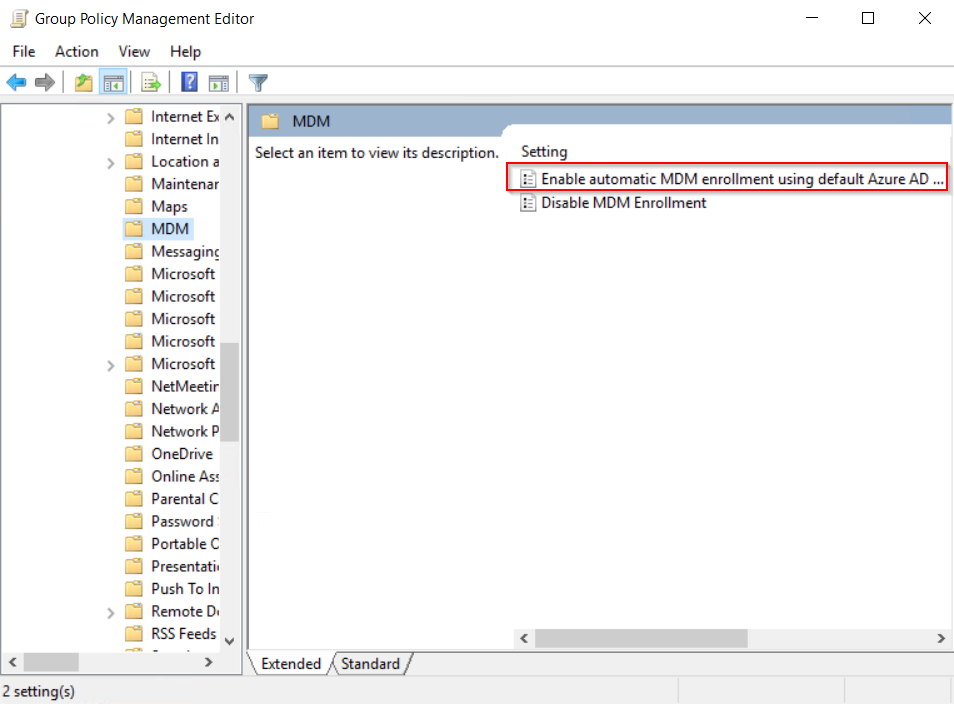
In Local Computer Policy, click Administrative Templates > Windows Components > MDM.
-
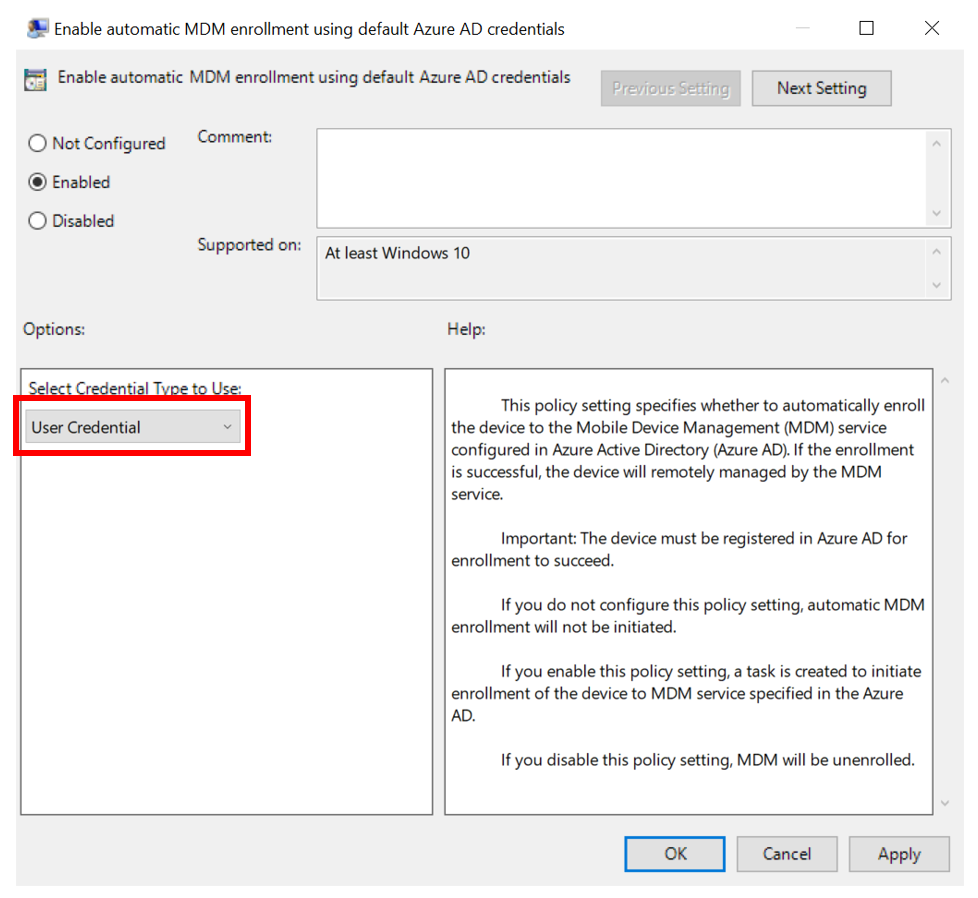
Double-click Enable automatic MDM enrollment using default Azure AD credentials (previously called Auto MDM Enrollment with AAD Token in Windows 10, version 1709). For ADMX files in Windows 10, version 1903 and later, select User Credential (support for Device Credential is coming) as the Selected Credential Type to use. User Credential enrolls Windows 10, version 1709 and later once an Intune licensed user logs into the device. Device Credential will enroll the device and then assign a user later, once support for this is available.
-
Click Enable, then click OK.
In Windows 10, version 1903, the MDM.admx file was updated to include an option to select which credential is used to enroll the device. Device Credential is a new option that will only have an effect on clients that have installed Windows 10, version 1903 or later. The default behavior for older releases is to revert to User Credential.
When a group policy refresh occurs on the client, a task is created and scheduled to run every 5 minutes for the duration of one day. The task is called " Schedule created by enrollment client for automatically enrolling in MDM from AAD."
To see the scheduled task, launch the Task Scheduler app.
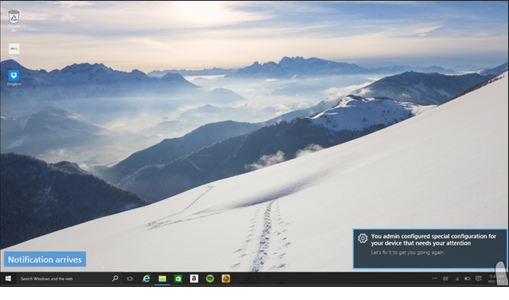
If two-factor authentication is required, you will be prompted to complete the process. Here is an example screenshot.
To verify successful enrollment to MDM , click Start > Settings > Accounts > Access work or school, then select your domain account.
- Click Info to see the MDM enrollment information.
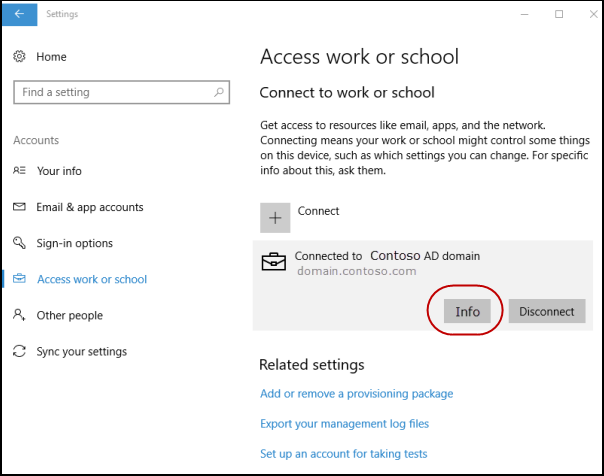
If you do not see the Info button or the enrollment information, it is possible that the enrollment failed. Check the status in Task Scheduler app.
Task Scheduler app
- Click Start, then in the text box type task scheduler.
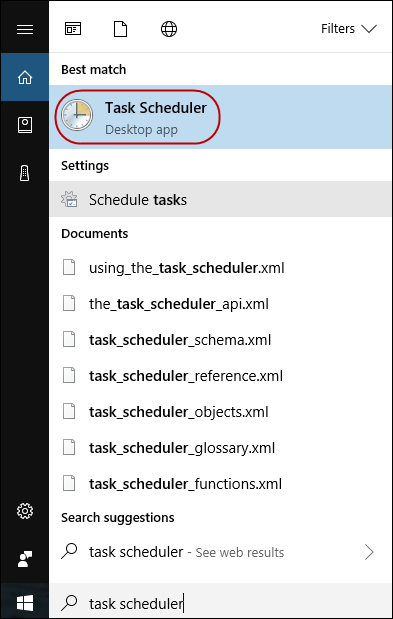
-
Under Best match, click Task Scheduler to launch it.
-
In Task Scheduler Library, open Microsoft > Windows , then click EnterpriseMgmt.
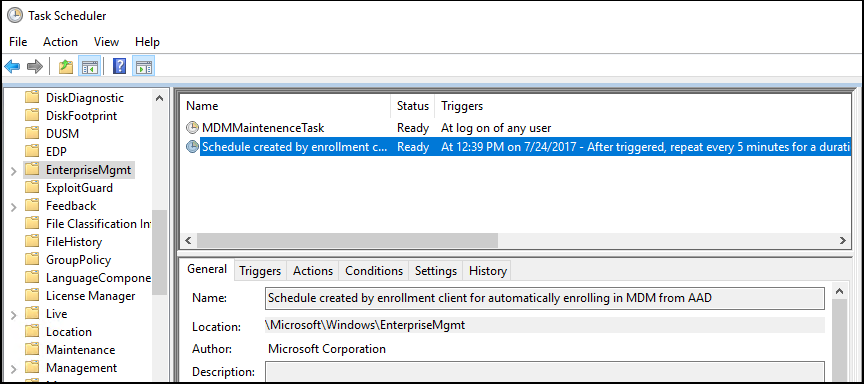
To see the result of the task, move the scroll bar to the right to see the Last Run Result. Note that 0x80180026 is a failure message (MENROLL_E_DEVICE_MANAGEMENT_BLOCKED). You can see the logs in the History tab.
If the device enrollment is blocked, your IT admin may have enabled the Disable MDM Enrollment policy. Note that the GPEdit console does not reflect the status of policies set by your IT admin on your device. It is only used by the user to set policies.
Was this article helpful?
That’s Great!
Thank you for your feedback
Sorry! We couldn't be helpful
Thank you for your feedback
Feedback sent
We appreciate your effort and will try to fix the article